
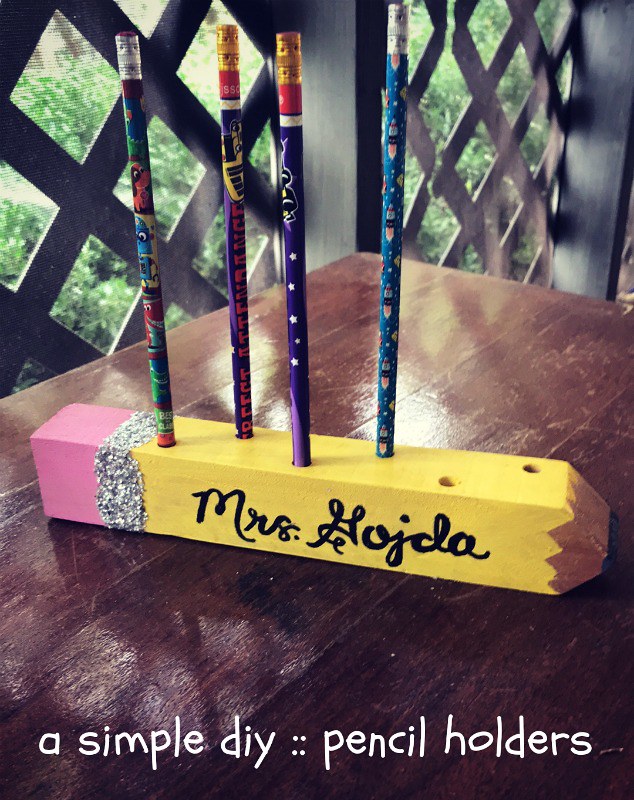
It’s the end of another school year and that means teacher gifts for all my children’s teachers! I choose to make all the teacher gifts instead of purchasing gifts for everyone. This year I had nine teacher gifts to make and I have been recovering from a shoulder impingement. So basically I had to use what was already available in the wood shed. I had several 2′ x 2′ pieces of wood that I could cut into gifts. Last year I showed you how to make your own ‘Teacher Door Hangers”. This time I would like to show you how to make A Simple DIY :: Pencil Holder.
Supplies:
- 2′ X 2′ piece/s of wood
- Miter Saw
- Acrylic Paint {gray, yellow, pink}
- Silver Glitter
- Wood Glue or Elmer’s Glue
- Black Paint Pen
- Sander
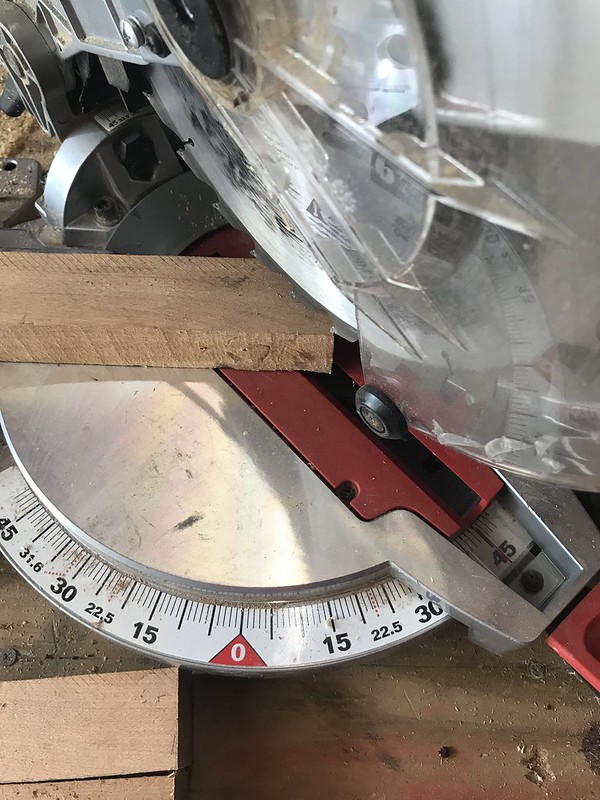
Step 1 :: The first thing you need to do is cut your wood into 12″ pieces and then cut one end at a 45 degree angle for the tip of the pencil. Cutting a 45 is so much easier for those that are not advanced woodworkers and it still gives you the total effect of being a pencil.
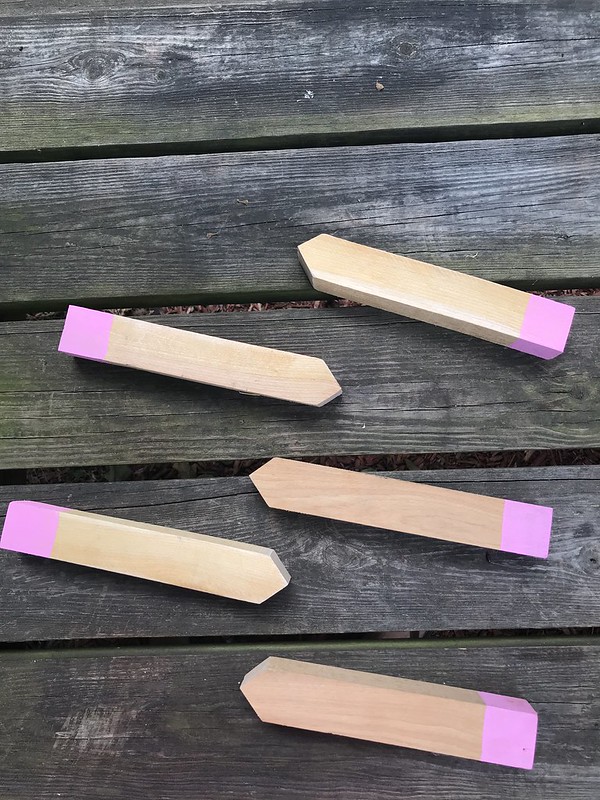
Step 2 :: Once you have your pencils cut you will need to sand you edges before you be begin to paint the erasers. I started with the erasers first to get my measurements exact before I began to paint the pencil.
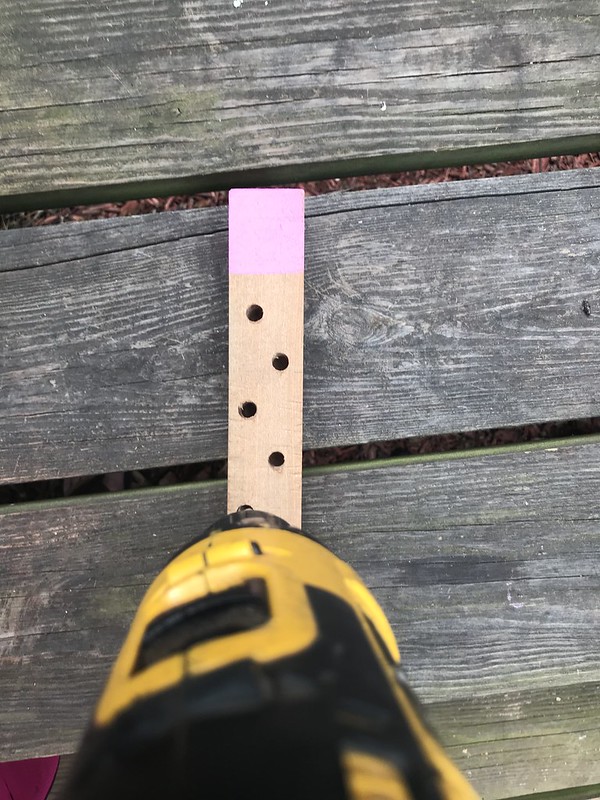
Step 3 :: Before I began painting the pencil area I went ahead and drilled the holes for the pencils. I had to sand after I drilled the holes and didn’t want to have to repaint the pencil area. Once the holes are drilled out I painted the pencil. Make sure to not glob on the paint around the holes or you will have to redrill.
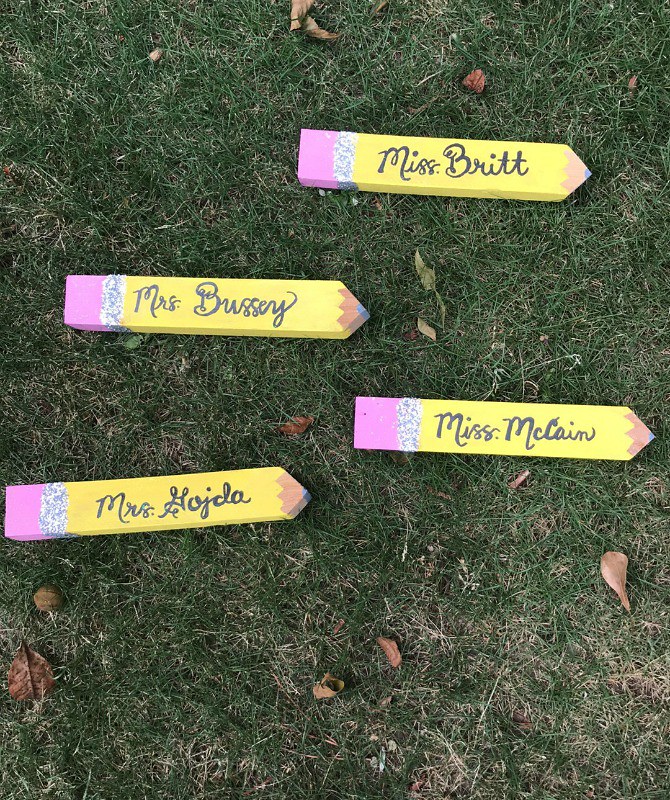
Step 4 :: The last thing you will do is add your glitter and the teacher’s name. Everyone loved their gifts and unless their name changes they will use these gifts for years to come.
Would you make these pencil holders for your children’s teachers?

Theresa
June 14, 2019 at 12:13 pmOM these are so cute!! I will have to bookmark these!