
I love adding simple little handmade decorations for the holidays! With Thanksgiving approaching I want to put little touches of my handmade items around my home. These hand painted signs can be displayed year round. Just think of all the great hand painted signs you could make with all the scrap wood lying around your shop! I haven’t bought craft materials in I don’t know when I just recycle what I already have. This is a simple diy :: be grateful sign that can add the perfect touch to your Thanksgiving decor around your home. They would also make a sweet little gift for someone in need of cheering up.

Supplies ::
- Wood block 4” x 8”
- White acrylic paint
- Paintbrushes
- Stain of choice if you choose
- Varnish or sealant of choice
Step 1 :: Cut your board down to a 4″ x 8″ block this way you can make several small signs, and you don’t have to worry about them tipping over due to being too large. This is a very intimate size that will work well anywhere you want to add a little touch of the season.
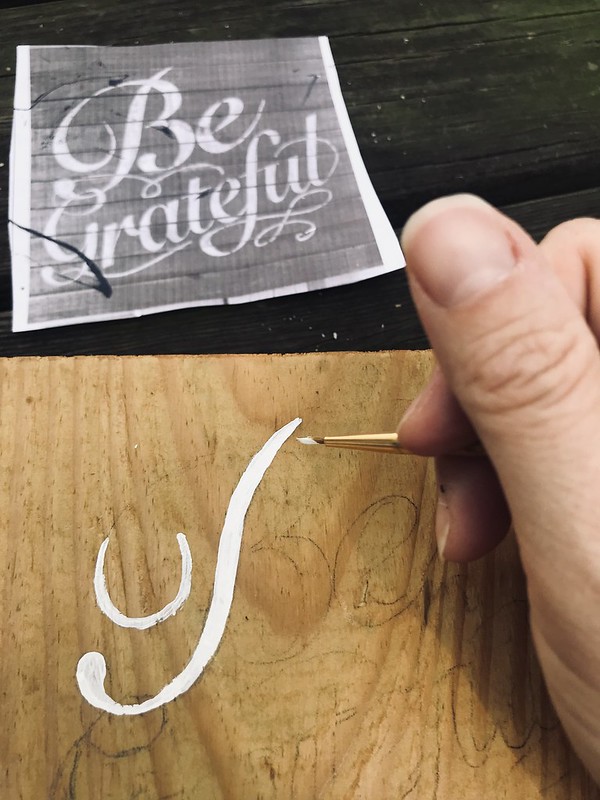
Step 2 :: Decide on a design of how you want your “Be Grateful” quote to look and sketch it out on your block. I always draw in pencil first to make sure I like my design on the wood before I start painting.

Step 3 :: Paint your “Be Grateful” sign letters using white acrylic paint. You may need to paint it several times even if you stain it first. Even if you stain your wood first it will still absorb the acrylic paint.
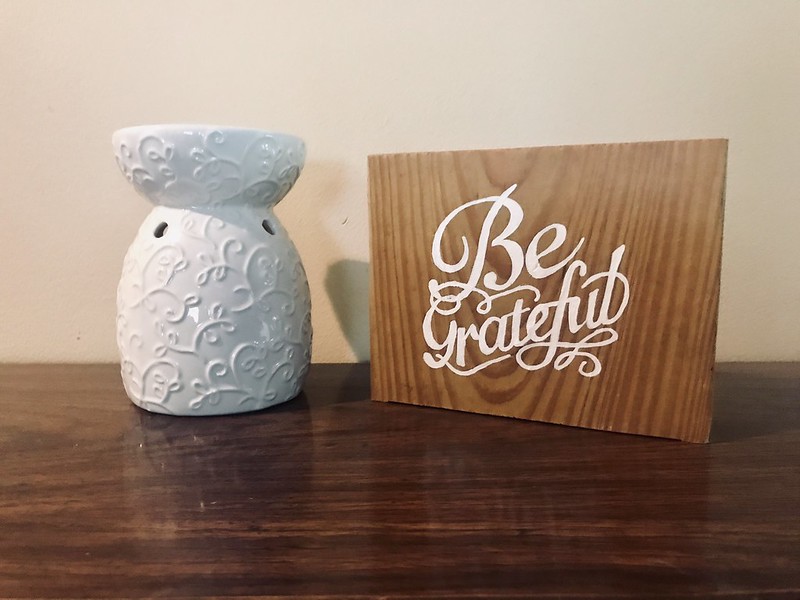
Step 4 :: Once you have finished painting your “Be Grateful” sign spray it with clear varnish to help it last longer. Now you can make several different signs to go with this one with your leftover pieces of wood.
Would you decorate your home for the holidays with this DIY Be Grateful Sign?


Theresa
November 15, 2018 at 7:25 pmThis would be nice on a mantel.