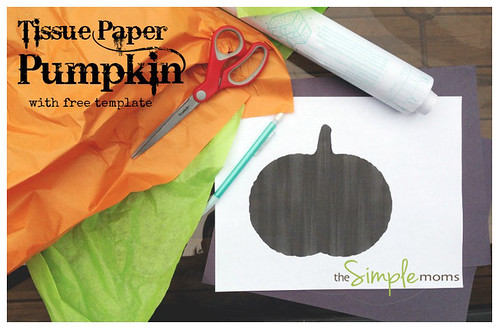
Halloween is almost here and my kids are super excited. They’ve been begging to do a Halloween craft and my daughter suggested painting pumpkins. Since we hadn’t been to the pumpkin patch yet and I wasn’t in mood to clean up paint mess, I suggested trying one of our favorite crafts Halloween-style : tissue paper art. It reminds me of those wax paper/crayon things we used to make as kids but with a lot less mess and effort!
What you’ll need:
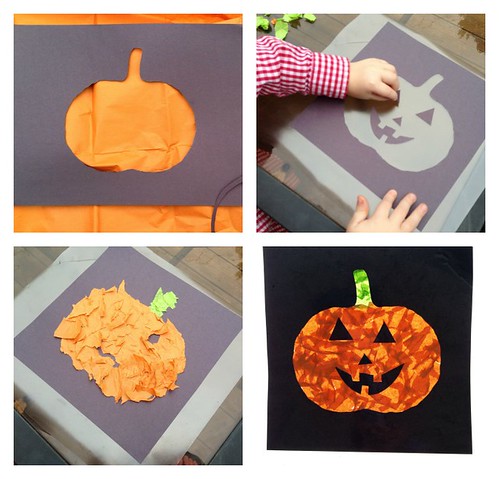
One sheet black paper per child
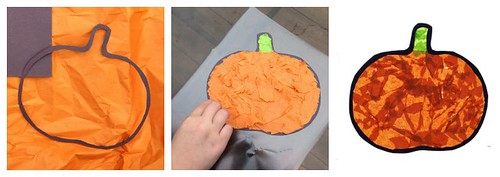
About 1/2 sheet of orange tissue paper, crumpled then uncrumpled and then torn into pieces
About 1/8 sheet of green tissue paper, crumpled then uncrumpled and then torn into pieces
clear contact paper (or vinyl or sticky paper)
scissors
1. Roll out contact paper so that it’s a little longer than your paper and cut. Repeat and set the two pieces aside.
2. Trace the shape of a pumpkin on your paper. Freehand it or use
this template I created.
3. Cut out the center without cutting through the edge of the paper.
4. Cut out eyes, a nose, and a mouth from the pumpkin shape left over from step 2. (optional)
5. Peel backing paper from first sheet of contact paper and carefully stick the pumpkin silhouette to it.
6. Stick the eyes, nose, and mouth on.
7. Stick the prepared tissue paper to the sticky parts inside the pumpkin shape.
8. Peel backing paper from other sheet of contact paper and carefully place it over the pumpkin and flatten around the edges.
9. Trim off excess contact paper.
For older kids you may want to cut out around the silhouette for a more defined suncatcher. Make sure that none of the tissue paper over laps the edges or the sticky paper won’t stay together when you cut it.
the southerner :: bridget is a mom and chauffeur to four tiny humans. she and her family live on a farm in an idyllic little southern town. they have a grumpy old dog and a kitten who likes to attack feet and eat crayons (but not at the same time). bridget likes to read, write, or pray in color late at night when the house is quiet.
Find more of Bridget on her blog, twitter, pinterest, instagram and Google+.