
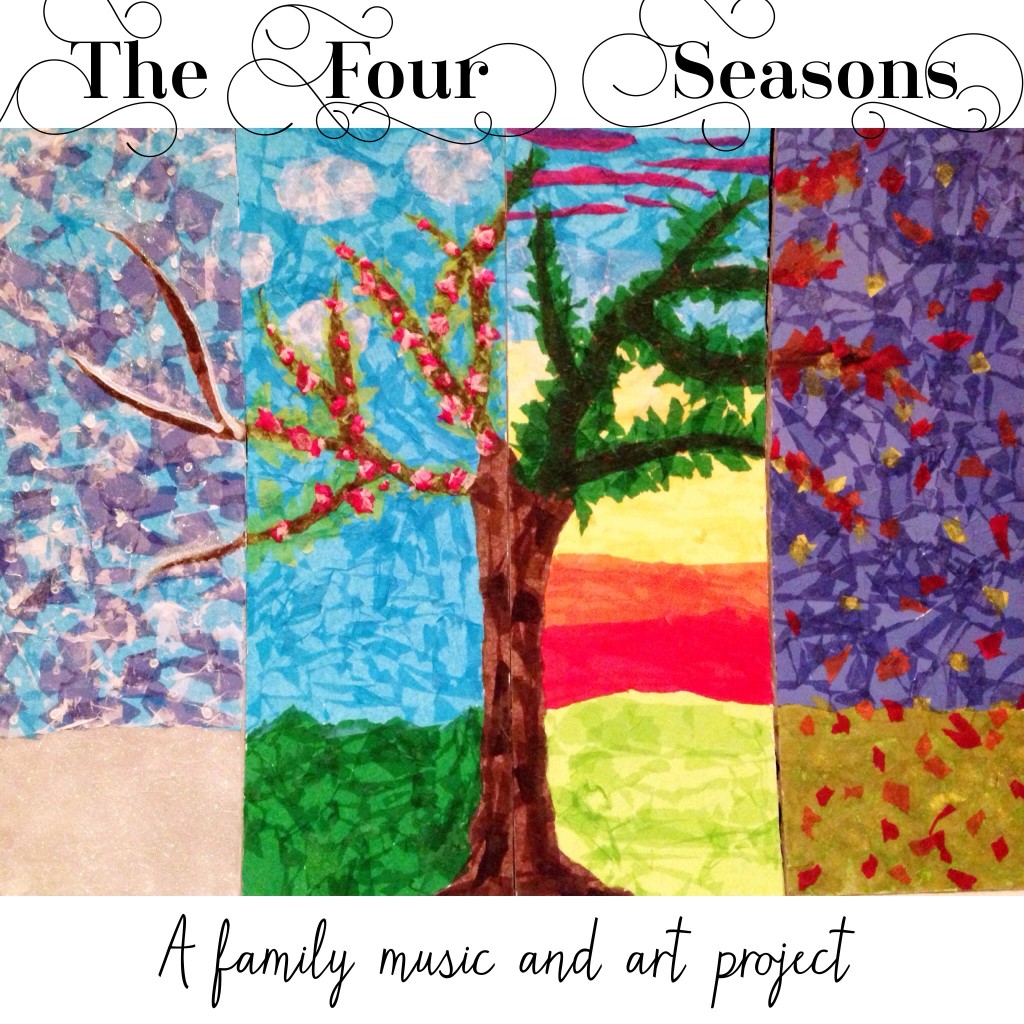
One of our favorite things to do in homeschool is to incorporate our music lessons with our art lessons. We recently did a month-long project on Vivaldi’s Four Seasons, and while we were doing that we made a quadtiptych, one picture spread out over 4 panels. I originally wanted to do it on canvas, but I couldn’t find the size I wanted without spending a lot of money. So here’s a simple look at how to make inexpensive art and enjoy working together as a family…as long as you don’t mind getting glue all over your hands.
Like I mentioned, I wanted to do this project on 4 long, skinny canvases, but I couldn’t find them at a reasonable price so I bought one big piece of foam core board. I measured it into 4 equal sections and cut it with a craft knife. My cutting was certainly not perfect, but it worked for what we were wanting.
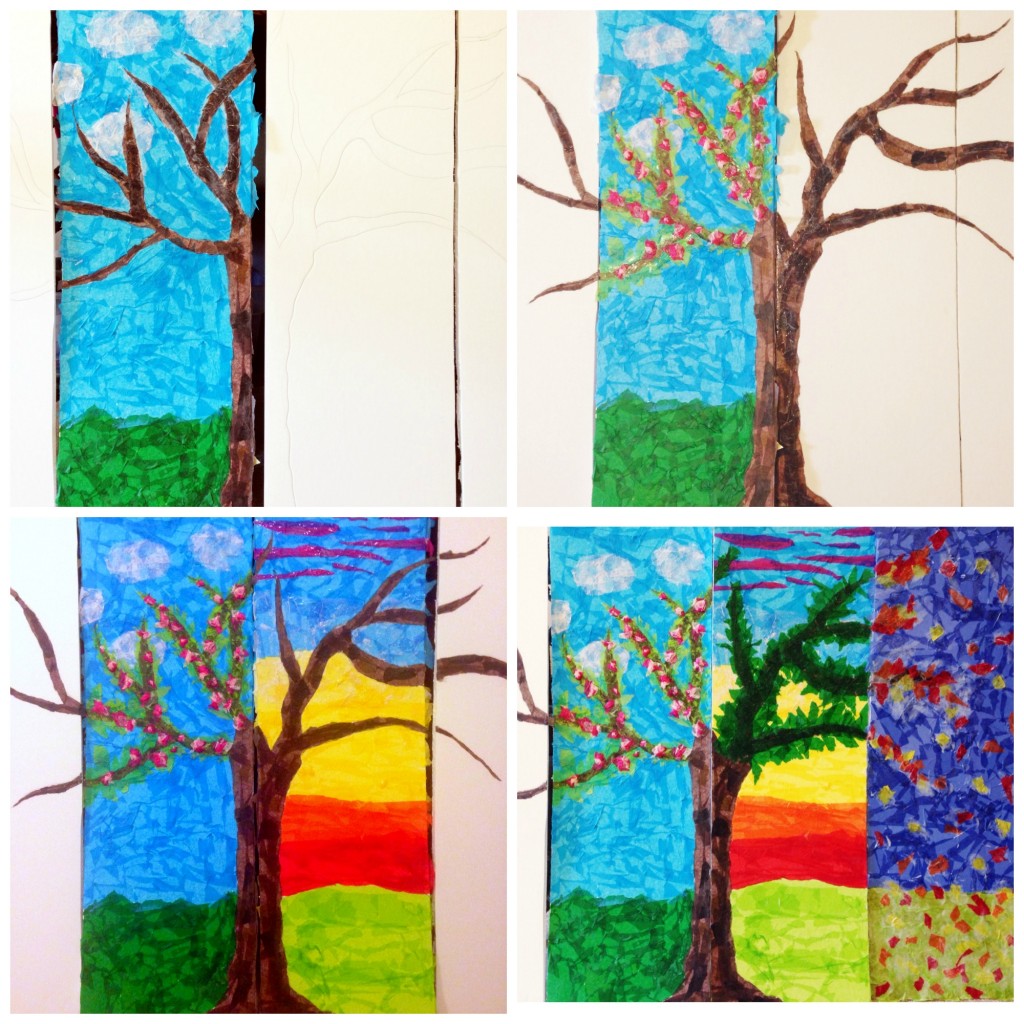
After you have your 4 panels, slide them together and free hand a tree trunk and branches in pencil. It doesn’t have to be perfect because you’re going to cover it up later. Just make sure that some of the branches extend all the way over into the side panels.
The trunk was the most tedious part because you had to make teeny-tiny pieces fit in just the right way. While my older kids helped with that, the younger children had lots of fun (maybe too much!) tearing up the tissue papers in the colors that we would need.
So how, exactly, does this work? I like to start at the bottom and go up. Spread glue (just regular old school glue) onto the small section you want to work on. Place the tissue paper down onto the glue and, using your finger, rub more glue on top of the tissue paper. This is not a hard project, but it’s not a fast one either.
You can see the progression of how we did ours here, but feel free to switch it up. Try different colors, different patterns, different textures. This could also be really cool done with fabric on canvas.
A few tiny tips:
- To give the tree a little more texture and depth, we started with a few pieces of black and gold scattered about. Then we covered it up with the generic brown tissue paper.
- You’ll see that in the spring section we added little flowers. Those were made with light and dark pink pieces balled up together and glued on. They do not have as much glue on top of them as the rest of the artwork.
- It’s also hard to see in these pictures but the winter one is covered in glitter. After we’d finished all the tissue paper and let it dry, we went back and put a fresh layer of glue on the bottom where the snow had settled on the ground and we dusted extra fine glitter over it. (You probably want to do this part outside). Then we went back over the top and put a few drops of glue where we wanted snowflakes as well as “shelves” of snow on the branches. We dusted the top with glitter and then it looked like we’d all been sprinkled with a little too much pixie dust.
My favorite thing about this project was that it was something everyone could help with, even the littlest lady in our house (who is 3). I began by drawing the tree by freehand but the rest of the process was guided by the children. They picked the colors and the details. They tore up the paper. They glued on the pieces. My only other job was to go back and glue over the top. And I loved listening to the music that corresponded to the different seasons. The children would describe what they were hearing in the music: the summer storms, the winds of autumn, snow glistening in the morning, and new life beginning in spring.
*I do want to note that the foam core board did warp slightly. It can be flattened out again by weighing it down with heavy items, but you can also just leave it as is. My intention was to hang it, but I kinda like how it sits up on our buffet that’s against our dining room wall.

Sarah C
September 30, 2014 at 10:43 amThis is Beautiful! I love that you were able to create it as a family. I’m going to have to do this with my kids. I love it!
Amy Orvin
September 29, 2014 at 9:40 amI was homeschooled too and we did a lot of fun projects together. This turned out beautifully! Thanks for the tips, also!!!