
Anyone else have American Girl fever going on over at their house? We’ve got it over here! Well…sort of… My daughter who is five, thinks she has one of the fancy dolls that she sees so many other girls with. However, the truth is, she’s got a knock off. Shhh…don’t tell her! Here’s something else she doesn’t know; I’ve got a real American Girl doll stashed away for her in my closet, for a day when she’s a little bit more responsible with her dolls. Okay, a lot more responsible. As in, she no longer sneaks Sharpies and gives her dolls facials with them. It’s not a pretty sight, friends. Anyway, until that day rolls around, we will stick with knock off dolls. {sigh}… and, my sewing machine and I will be the source of their knock off clothing, because you know…Sharpies tend to wander to doll clothing, too.
At first, the idea of sewing doll clothing sounded a bit strange to me, I’ll admit it. But, when I realized just how much can be spent on a doll’s wardrobe, I decided I’d try my hand at sewing tiny clothes. Guess what happened? I found out it’s actually not that difficult! In fact, some pieces are pretty easy to whip up, they take very little fabric, and they’re a quick project. I was so excited when I discovered this, that I couldn’t resist putting together a quick tutorial to share with you!
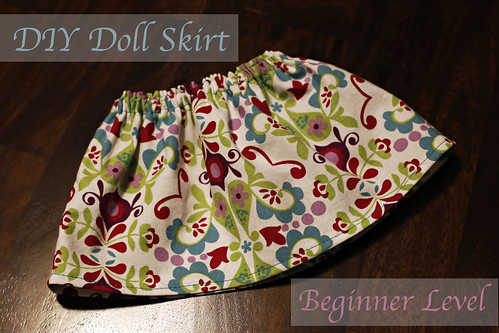
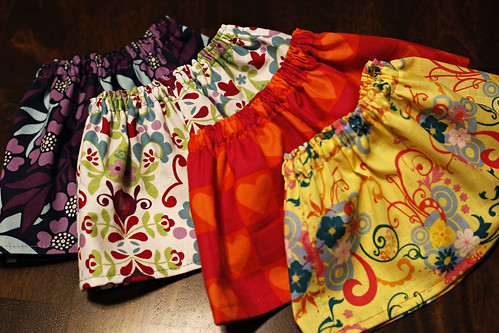
This skirt project is a beginner level project, it is easily adjusted so you can make variations of the same skirt, and it should fit pretty much any 18” doll. Your little princess will be so excited about her doll’s new wardrobe, and you will forever wear the title “Super Mom”…as if you haven’t already earned that multiple times each and every day…
So, let’s get to it!
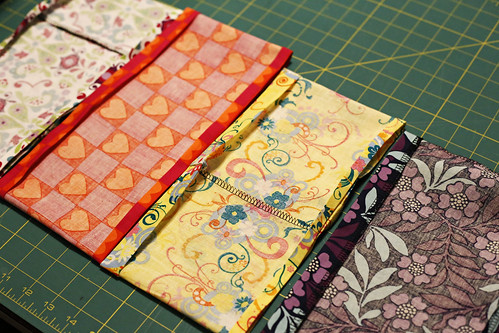
Start by gathering your supplies. Ideally, you want your fabric cut to 7.5 x 24 (ish) inches. These skirts are pretty forgiving, so if you have a few inches less than 24, don’t worry. The skirt will have less “flutter,” and will be a bit flatter in style. You can also use two 7.5 x say 12 inch pieces and make two side seams instead of one in the back. The doll skirts pictured came straight from my fabric scraps. Only one of them was the full 24 inches. The others were completely improvised.
Supplies: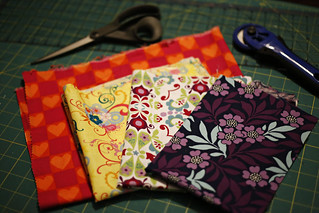
- Sewing Machine
- Fabric
- Coordinating Thread
- 10 inch piece of ¼ inch elastic
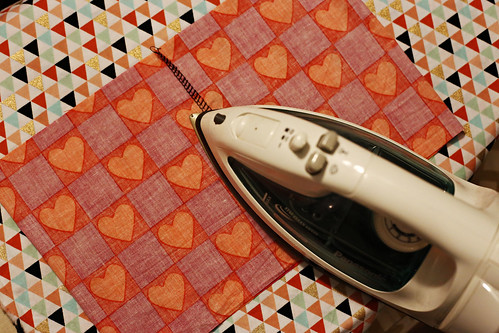
- Iron your fabric. It will make your finished product look much better, and it’s way easier to work with crisp fabric.
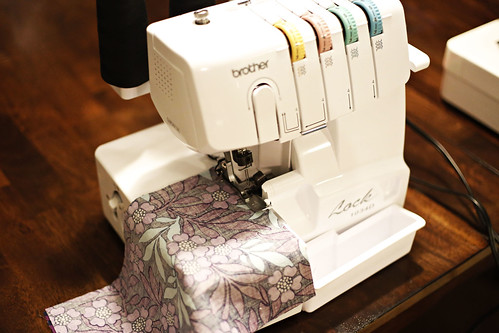
- With fabric right sides together, serge, zigzag, overlock or straight stitch your seam or seams, if you’re using two pieces of fabric. Be sure to backstitch to secure your thread.
- Press your seam flat.
- For skirt hem, either serge all the way around if you have a serger, then press ¼” toward the wrong side of the fabric; or, press fabric up ¼” toward the wrong side of the fabric, then again another ½”. This will encase your raw edges and eliminate fraying at the hemline.
- Turn skirt right side out, and top stitch ¼” from the edge, around the entire skirt.
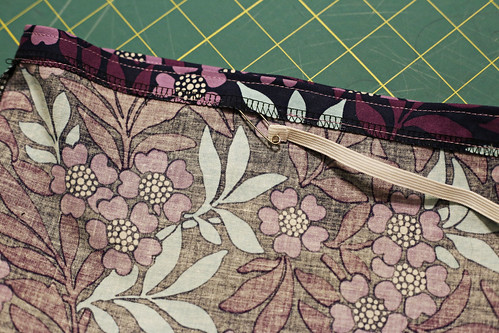
- For the waistband, either serge all the way around, then press ¾” toward the wrong side of the fabric; or, press fabric ¼” toward the wrong side of the fabric, then again another ¾”.
- To create casing for elastic waistband, stitch ¼” from the serged or pressed edge, making sure to leave an inch and a half opening at the back of the skirt.
- In my opinion, waistbands look better, and tend to roll less with an additional ¼” top stitching at the top of the skirt. (You can omit this step if you would like. Really, this one is personal preference. And yes, I realize this is a doll skirt, but a polished product is a polished product, right?)
- Using a safety pin, work your elastic through your casing.
- Sew ends of elastic together. A zigzag stitch works well for this step.
- Close your casing with a straight stitch and adjust the fabric around the elastic.
- Finally, pass along this adorable skirt to your sweet little one and soak in her excitement! Congratulations, you have just earned mother of the year status…at least for the next few hours. Cheers!

Talk to me…do you create toys and/or accessories for your little ones? What are some of your favorite DIY projects for the kiddos in your life?

Maryann D.
January 17, 2016 at 8:42 amThese skirts are so adorable! My mom used to make doll clothing and wedding dolls when she was younger. It is a wonderful skill to have.
Sarah
January 18, 2016 at 12:30 amThank you! I sew a lot, but was really quite intimidated by doll clothing because it is so small! Once I finally gave them a try, I realized that they are a great project! Very rewarding because they’re pretty quick. What your mom used to do sounds way more detailed that what I’ve attempted, though! I bet the wedding dolls were amazing!
Maryann D.
January 18, 2016 at 8:12 amThe dolls were amazing and everyone loved them! I wish I inherited this talent for sewing.