
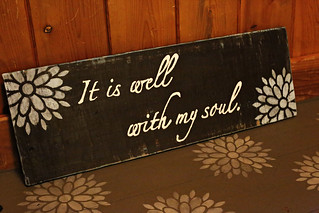
This week, up in the mitten state, we have been under quite the winter storm warning. Like, shut the world down, prepare for power outages, plan on not leaving your house for days, kind of storm. It’s Michigan, so this isn’t anything new to us. However, as familiar as these storms may be, when they hit, cabin fever still sets in almost immediately! In attempt to not go stir crazy, I generally turn to something crafty! This week, it was a hand painted sign for our family room.
This sign took me about two hours from start to finish, and I had all of the supplies I needed, just laying around the house. Perfect project for a stormy evening! I’m not a talented painter by any means, and my sign turned out pretty cute! Have a saying you would like to put on your walls? Follow these simple steps, and you’ll have an adorable sign for your home in no time!
Supplies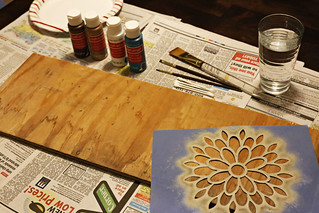
- scrap wood
- paint – I used basic acrylic craft paint
- paint brushes
- sand paper
- phrase printed on regular printer paper
- ballpoint pen
- stencil (optional)
Step 1: Decide on a design for your sign. Find a font you like on your computer or online, and print your phrase or saying on printer paper. Cut the phrase out, and set it aside. It’s okay if the words don’t all fit on one piece of paper, you can piece it together later.
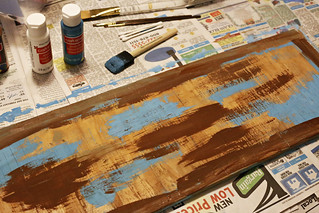
Step 2: Paint wood in random places and along all edges. Use multiple colors, as later you will sand the edges and distress areas, allowing the color to show through.

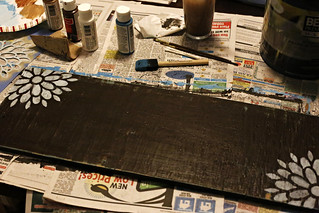
Step 3: Paint your main color over the entire piece of wood, making sure to cover the edges.
Step 4: Once paint is dry, lightly sand the edges of your board, as well as random areas across the face of the wood. The key is to distress the board slightly, but not too much. Less is more here.
Step 5: Add a stencil or design if you prefer.
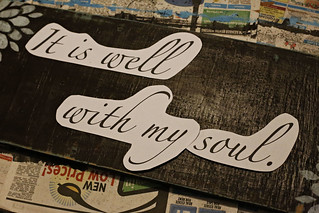
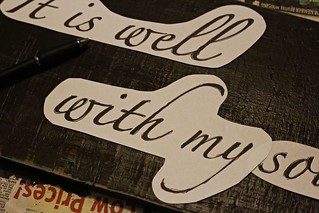
Step 6: Arrange your phrase or saying on your board.
Step 7: With a ballpoint pen, trace all letters. Apply a decent amount of pressure as you are tracing. This will leave an outline in the paint, which you will use as a guide for hand painting the words. This same technique can be used if you want to add a design to your sign, but don’t have a stencil handy. Just print a design on computer paper, trace, and viola!
Step 8: With a fine paint brush, paint in your letters. Be patient, this part takes a steady hand! My letters needed a couple coats of paint before they looked how I wanted them to.
Step 9: Find a wall space, and hang up your beautiful handmade sign! Stand back, admire your work, and enjoy the feeling of accomplishment!
Do you turn to creative projects when you know you’re going to be stuck at home? What’s your go-to activity for helping pass the time in a storm?
Rosie
January 3, 2016 at 12:47 pmI would have never figured out how this was made. I love it, it is so cute, now I want to to this!
Sarah
January 18, 2016 at 11:39 amDefinitely give it a try! It really is a simple project once you know the steps and how to of it. 🙂
Carissa Alexander
December 31, 2015 at 8:40 amNext time try using chalk on the back of the paper with words on it. Just flip over the paper and cover the surface with a contrasting color of chalk then place on wood and trace. This way you won’t have to press as hard to get an outline of the words!
Sarah
January 18, 2016 at 11:40 amYes! You mentioned this to me before! I totally forgot about that method! Next time, I’m definitely going that route. Probably way easier to see the chalk lines, too!
Maryann D.
December 30, 2015 at 3:58 pmI will tell her, but she is a great artist and figures out all sorts of things. She probably can do it free hand also!
Sarah
December 30, 2015 at 11:04 pmOh good for her! I would love to be able to paint script free hand! It would turn out looking like a preschooler made the piece, though! Yikes!
Robin
December 30, 2015 at 12:49 pmYou are VERY crafty! That sign turned out very cute and I can’t believe that it only took you a couple of hours. Love the trick of simply tracing the phrase…I’ll use that trick.
Sarah
December 30, 2015 at 2:51 pmThank you! I really appreciate that! It really is a very easy craft to make. The key to it being so quick is having a plan in place to start with. The process is very simple and acrylic paint dries quiet fast! And, the tracing trick is gold! You’ll fall in love with it if you give it a try!
Maryann D.
December 30, 2015 at 6:30 amMy daughter love to paint wood or make different crafts with extra pieces of wood. She would certainly enjoy making this.
Sarah
December 30, 2015 at 2:54 pmHas she tried the trick with tracing a font and then painting in the lines to apply the phrase? That has been life changing for me in my painting projects!