Confession: I love snow! From a distance. I love it from the coziness of my blanket and mug of hot cocoa. There is just something magical about those white flakes falling from the sky. On those snowy days, my kids and I like to pretend we’re living in a snow globe!
But Winter won’t be here forever (yay!), or at least that’s what a certain little rodent told us last weekend. So, here is a fun craft to do with your kids to preserve that snowy magic or to bring a little of that snowy magic to you if you live in a snow-free climate!
MAKE YOUR OWN SNOW GLOBES!
Supplies
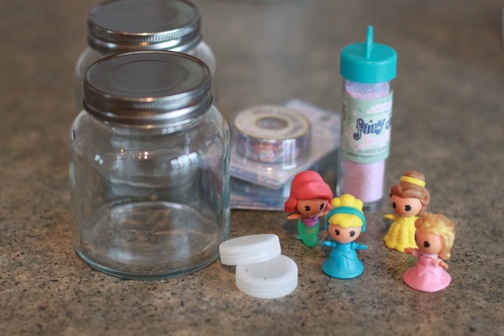
- Glass Jar with lid — Any size! This is a great time to reuse baby food jars, jelly jars, applesauce jars, or mason jars. You can also purchase a variety of glass jars at your local grocery or crafting store.
- Small waterproof toys or knick-knacks — Grab those little toys hanging out at the bottom of your toy box, Squinkies, little LEGO guys, game pieces, etc. Or pick up some from the dollar store or craft store. Just be sure they will fit inside your jar and that they are waterproof!
- Glitter
- Hot glue & glue gun
 Step 1
Clean and dry your jar and lid.
Step 2
Hot glue your toy or knick-knack to the inside of your jar lid. Depending on your toy and the depth of your lid, you may need to use something to give it a “boost” so it can be easily seen in the jar. You can use a piece of cork, LEGO, or bottle top for this. Simply hot glue your “booster” to the jar lid and then hot glue your knick-knack to the “booster”. Let it dry.

Step 3
Fill the jar with water, leaving about a 1/4 inch space on top.
Step 4
Sprinkle in the glitter! You can use any weight or color glitter. The finer the glitter, the more it will float in the water as it moves from top to bottom. A dash or two of glitter should be enough.
Step 5
This step will require a little speed and precision! Using your hot glue gun, run a bead of hot glue completely along the inside of your jar lid and screw the lid (with the toy glued on it) onto the jar making sure it is secure. Let the jar sit (lid up) so the glue has time to dry before getting wet.
To make sure our jar would not leak, I ran another bead of hot glue along the edge where the top and glass met. You can leave the lid as is or dress it up with a ribbon!

That’s it! Shake it up and enjoy the snow!!!
Awesome idea!
That’s really cute and I share your love for the snow. I’m also a HUGE fan of snow globes. I don’t even want to talk about how many I have at Christmas. I have a problem. 🙂
Oh my WORD! Ingenious! Thank you!!!